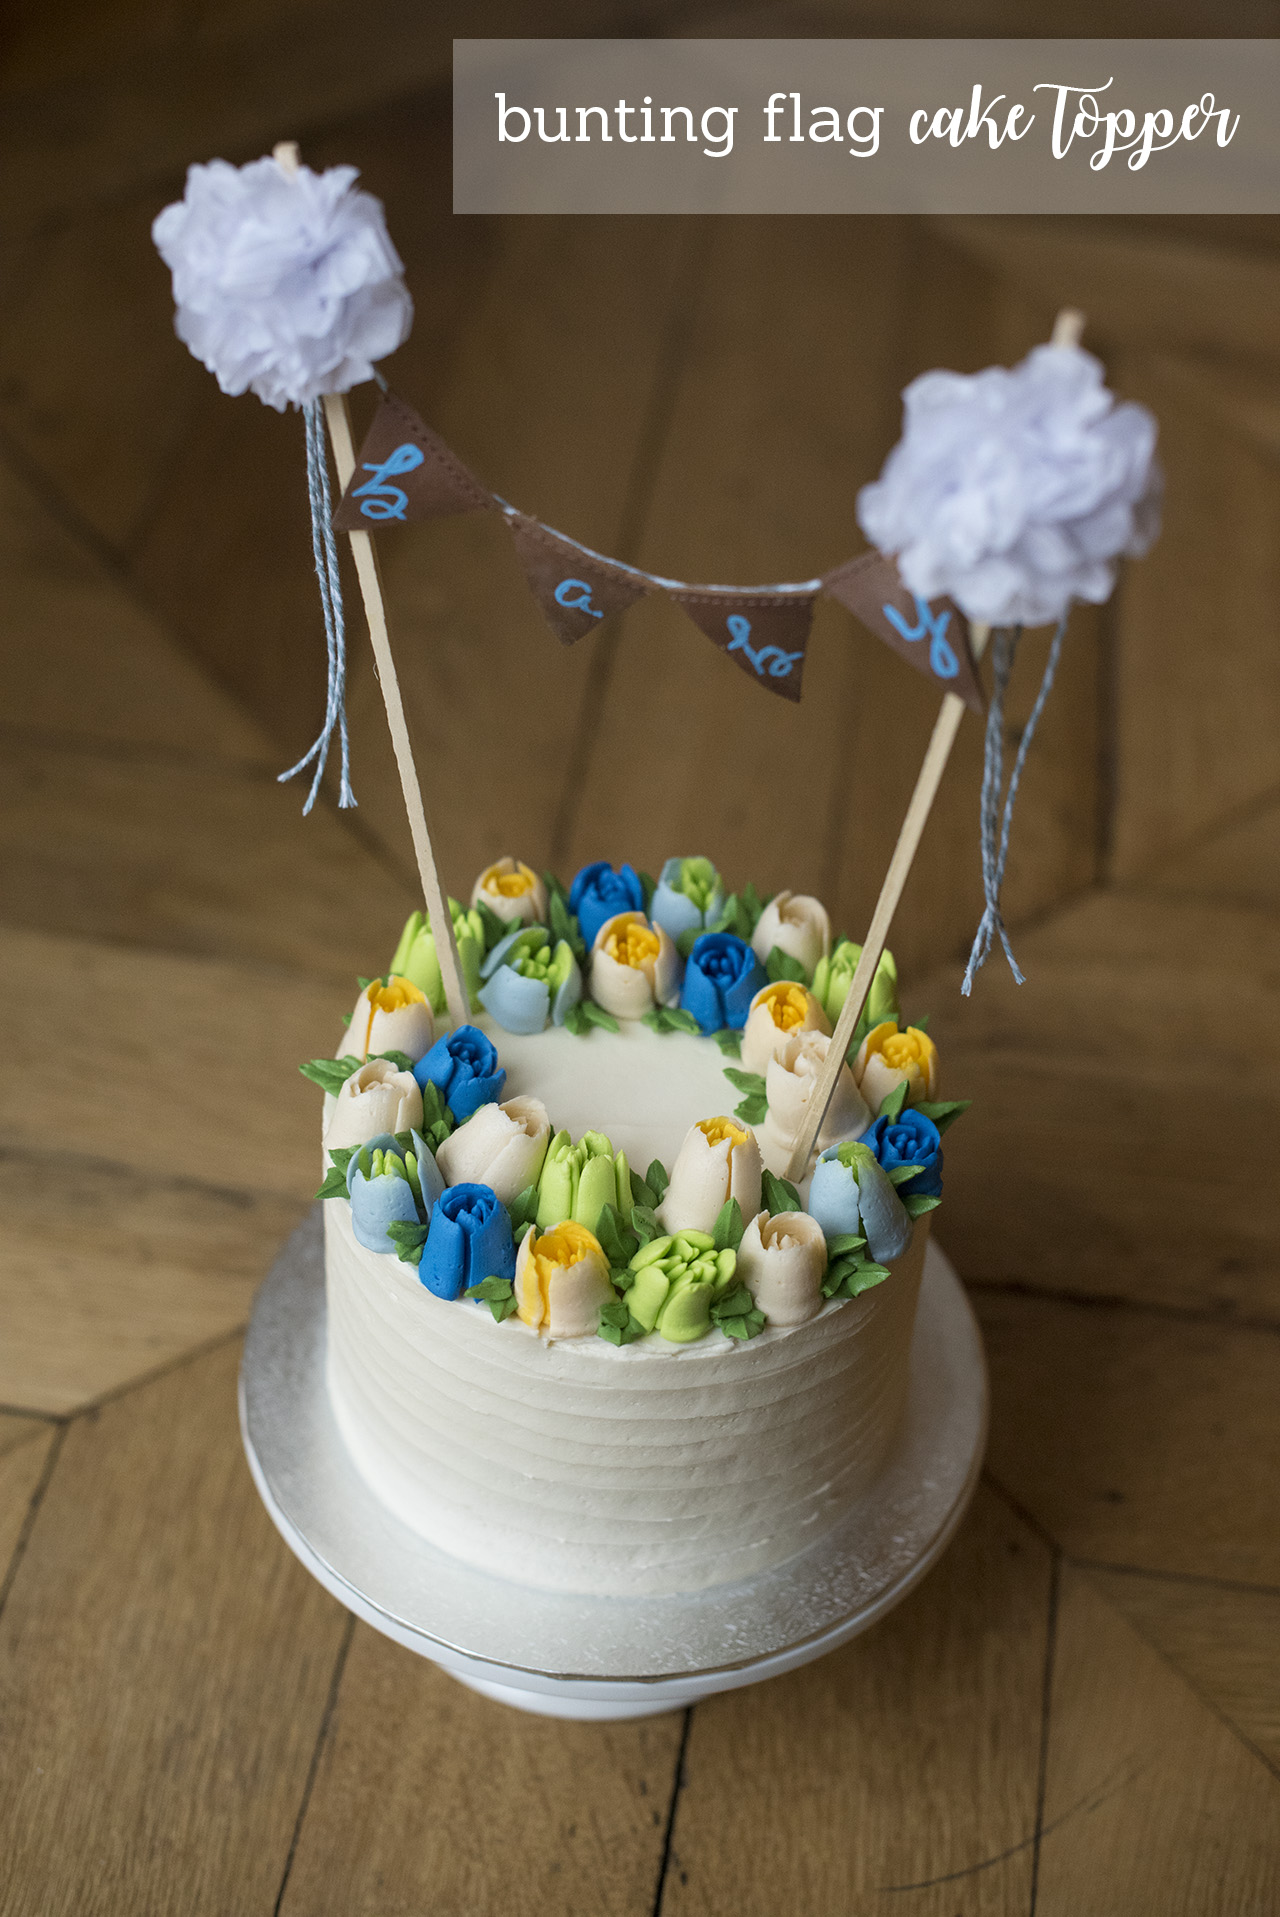
I love little bunting flag cake toppers! They’re simple, cute, and fully customizable. I first came across them back in 2013 when I was searching for a topper for our wedding cake, and ended up finding one on Etsy that I loved (see photo below – I tried to link to the Etsy shop, however, it seems they no longer make these toppers).
{Photo Credit:
Sandra-Lee Photography
}
A friend and I hosted a little baby shower this past weekend, and I decided to make my own flag topper. Here’s how I did it…
You’ll need:
• small piece of card stock
• pen
• scissors
• leather scrap material (or other non-fraying fabric)
• acrylic paint + fine brush
• string or twine
• hot glue gun
• 2 long and sturdy toothpicks or wooden skewers (12″ long)
• chunk of styrofoam
optional, for the mini tissue paper pom-poms:
• tissue paper
• ruler
• scissors
• string or twine
1. Use the card stock to cut out a template for the flags. Keep in mind how big you want your letters to be, and how long the word you need to spell is. (The triangle I used was about 1 ¼” at the base and 1 ¾” high, which nicely fit four letters on a 6″ cake.) Trace the flag onto the leather and cut out the pieces.
2. Draw the letters onto the flags using the pen, and then carefully paint over the lines with the acrylic paint. Let the flags dry for a couple of hours before continuing.
3. Use hot glue to attach the twine to the very upper edge of the back of the flags.
4. Stand the skewers in the piece of styrofoam, and attach the string of flags. I used a little hot glue before tying them in place, just to be sure it was extra secure.
This would make a super cute topper just as it is, but I decided to add a couple of mini tissue paper pom-poms to each side. They’re easy to make, but the mini-factor does make them a little tedious!
5. Cut out 8 tissue paper rectangles measuring about 3″ x 4″ (they don’t have to be perfect) and stack them on top of each other.
6. With the short side facing toward you, accordion fold the stack until you reach the other end.
7. Tie a piece of string around the middle. Use scissors to round the ends.
8. Starting with one end, fan out the accordion folds, and then separate the layers of tissue paper, one by one.
9. Do the same with the other side, and then give it a little fluff.
10. Make two pom-poms, and tie one to each post.
So cute! ♥